Dataplicity Ran Once Never Ran Again
Raspberry Pi Autonomous RC Motorcar
My first endeavor at edifice an democratic RC car with a Raspberry Pi 3.
Beginner Work in progress 10 hours 12,700
Things used in this project
Hardware components | ||||||
| × | i | |||||
 | × | 1 | ||||
 | × | 2 | ||||
| × | 1 | |||||
 | × | 2 | ||||
 | × | 1 | ||||
 |
| × | 2 | |||
 | × | 2 | ||||
 | × | 2 | ||||
| × | one | |||||
Software apps and online services | ||||||
 | ||||||
Story
My married woman and I were shopping at our local Large Lots store right later on Christmas when I came across some marked down RC cars. I have e'er wanted to try and build a Rasperry Pi "smart car." I figured for the price, why non give it a shot. The worse I could practise was lose the $20.00 for the car.
This is the motorcar when i first got it out of the box
When I got it domicile, I sat out to accept the automobile apart and come across what was on the inside. The get-go matter I noticed was this car had 4 wheel bulldoze and a separate engine that controlled the steering of the car. I needed to come up with a way to control all three engines at once so the car could drive autonomously. I also needed to figure out how to supply power to the auto and the engines.
The car originally ran on 5 AA batteries. Which would have been fine to run the motors, however, I wanted something that would exist easy to supplant. Since the AA batteries are 1.five volts each (seven.5 full volts), I needed to notice something that would have been comparable and would besides allow me to recharge them. My first thought was to lodge a battery pack from an RC store, but I wanted to keep the projection as cheap as possible. I confiscated some 18650 batteries and decided to use those instead. I ordered a pack of battery holders and soldered two of them together in series.
18650 battery holders soldered together in series
The two 18650 batteries put off around four.seven 5. (4.vii ten ii = 9.4v). Even though the motorcar originally ran on vii.5 volts, the 9.4 volts wouldn't fire up the engines when you lot cistron in voltage loss because of the soldering. What I ended upward with was 8.4 volts being supplied to the breadboard.
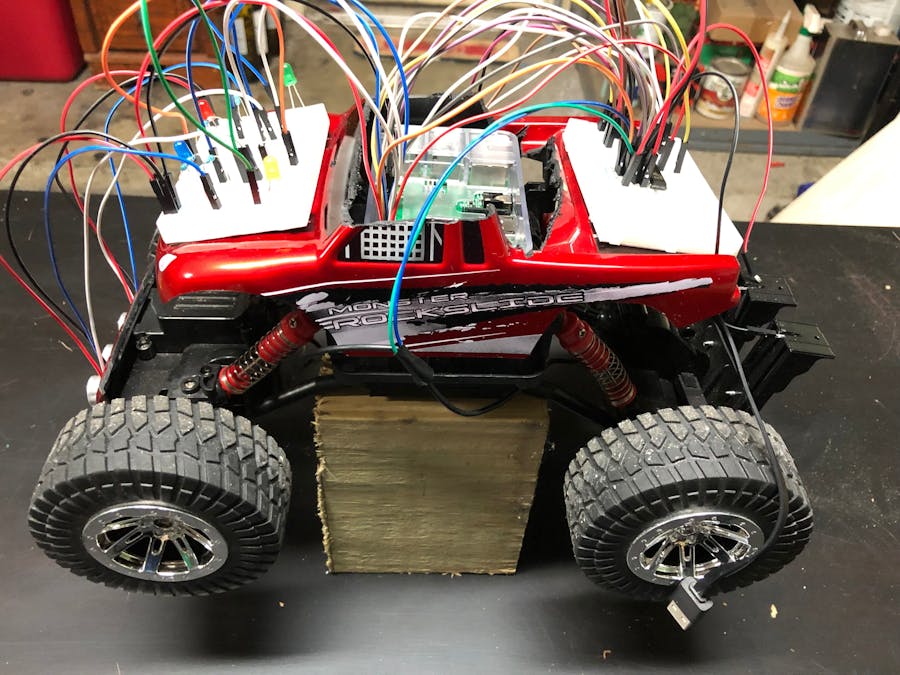
At present that I had the power figured out, I needed to effigy out how I was going to mountain everything on the body. The car that I was using has individual interruption, which means that if the weight is not distributed evenly, it will ride crooked and in doing and then will not make the front sensors work correctly. I wanted to keep the trunk, if possible, so I took my Dremel and cut the roof of the car off, that would allow the Raspberry Pi to sit on the frame of the car. I attached ii half breadboards, 1 to the dorsum for the engines and 1 to the front for the sensors. I was going to originally just apply one and have everything run off of them, but since I wanted to continue the weight distributed evenly, I went with two.
Superlative cut off and the Raspberry Pi sitting on what was the acme of the battery compartment
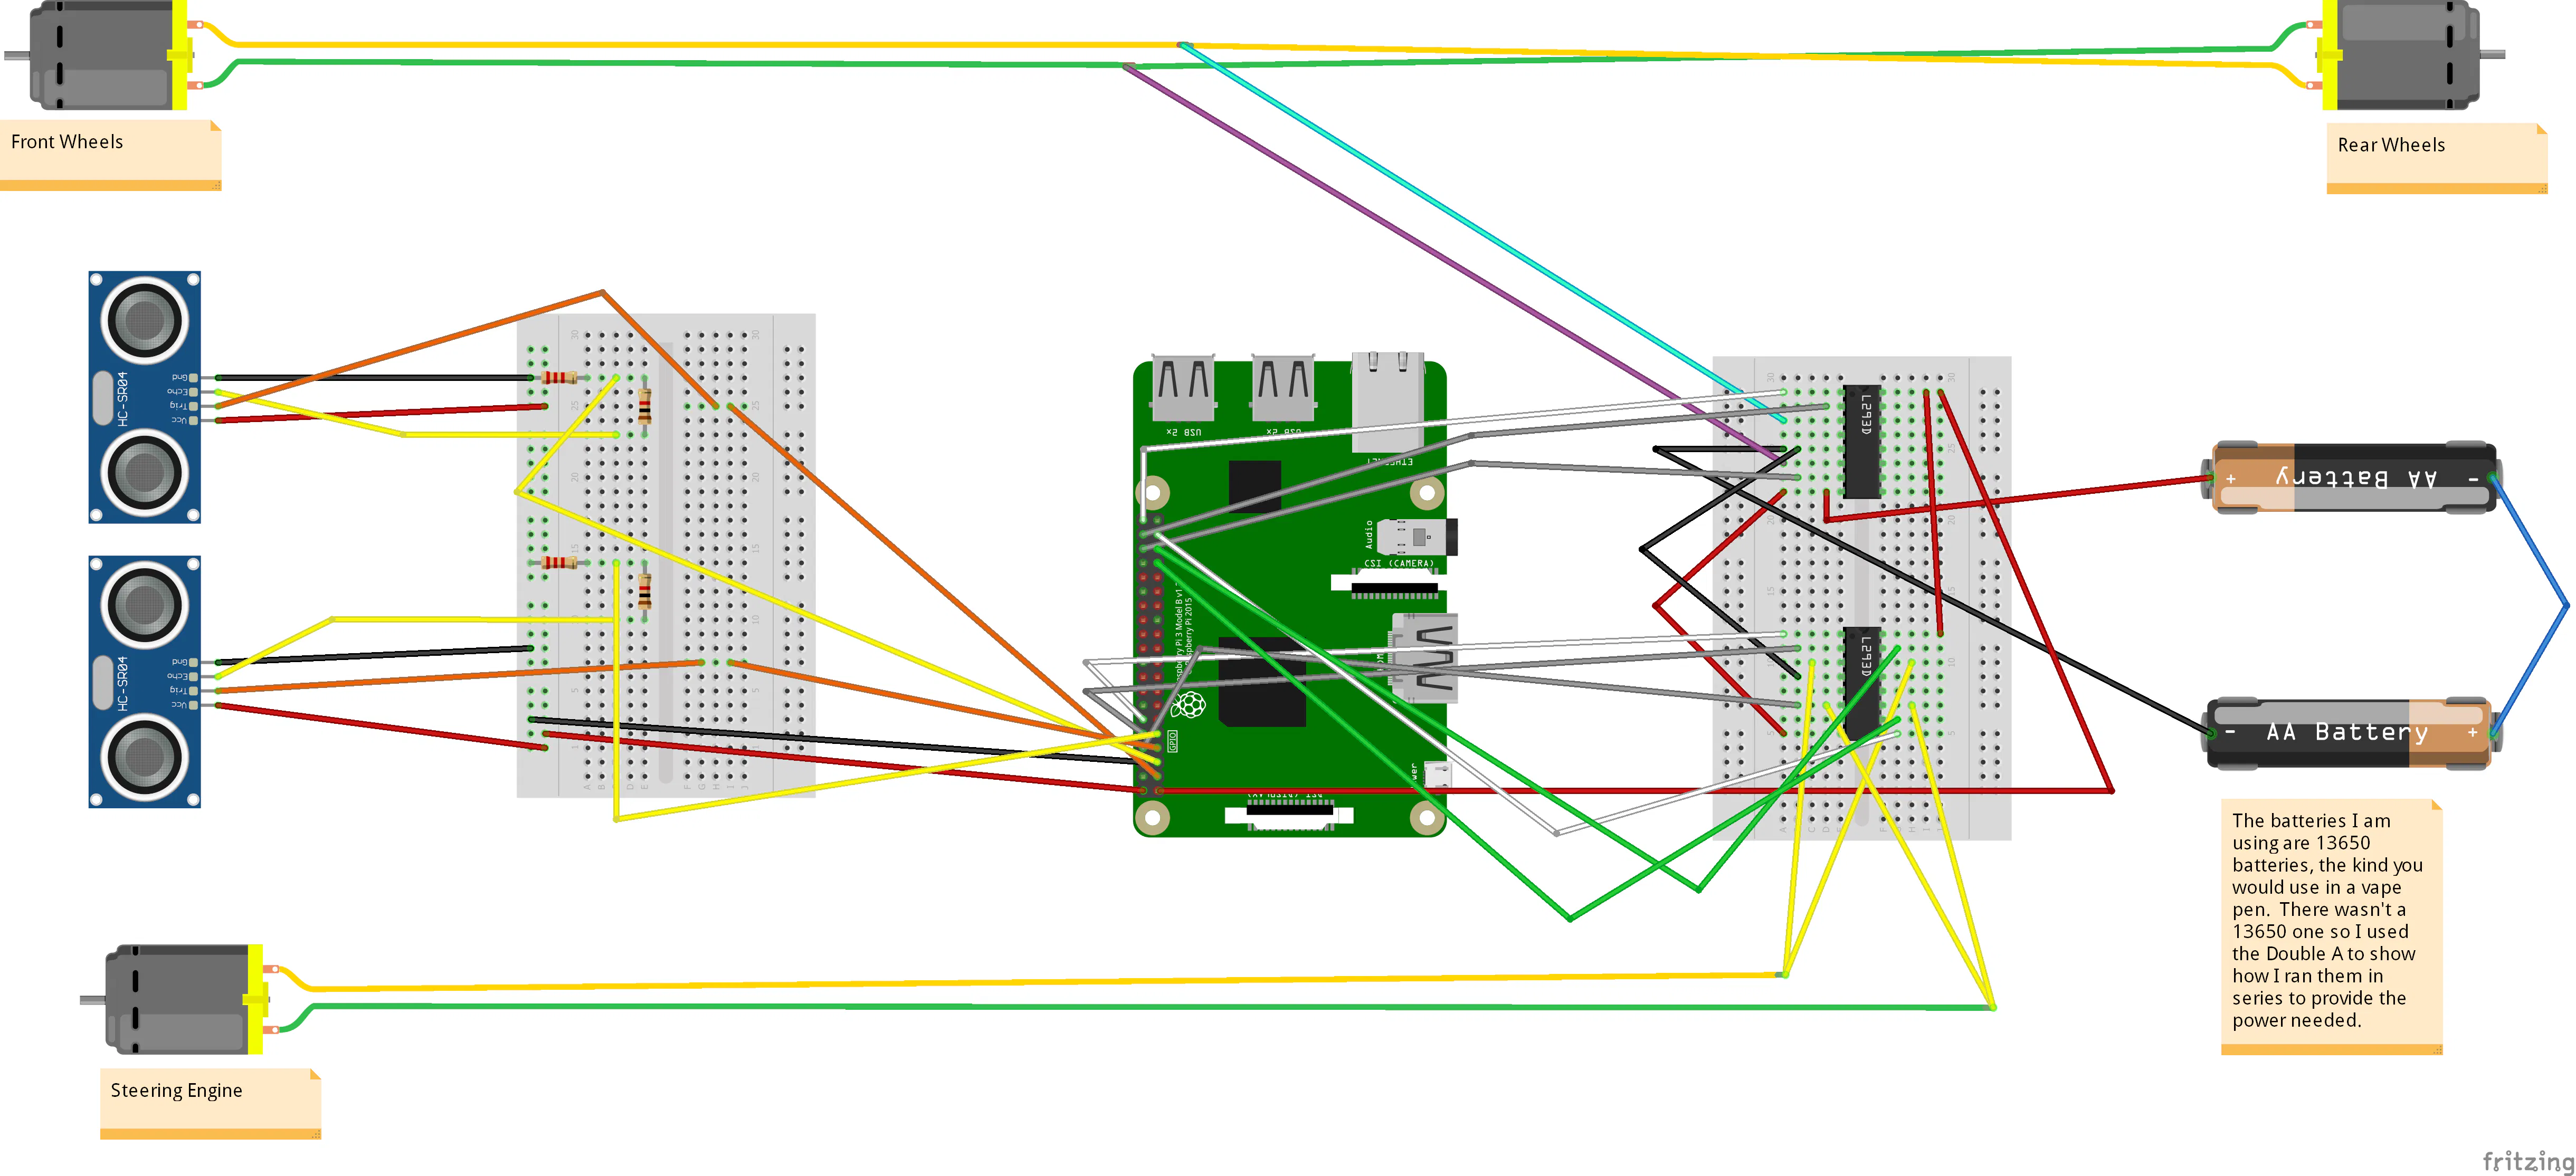
I read through many great articles here on Hackster.io to figure out the best way to command the engines. I concluded upwards going with 2 L293D chips. 1 of the chips command both the front and the dorsum bulldoze engines at the same fourth dimension. If you are using a car that has iv wheel bulldoze, connect the front drive and the back drive together, and then connect both of those to the output on the L293D chip. Yous can brand them go forward and backwards depending on which pins you ready every bit Loftier on the GPIO lath of the Raspberry pi.
Some other catchy office that I ran into was the ability to steer the motorcar. I took the same approach as I did with the drive engines and used the input and output on ane side of the L293D chip. In doing this, it would merely command the automobile turning in one direction. Later on many frustrating attempts, I finally figured out that if I utilized both sides of the L293D chip, I would trigger the steering engine to go both Left and Right. The just downfall of this arroyo is that you have to use a total of half dozen pins on your Raspberry GPIO board merely to steer the auto.
The last thing I wanted to add to the auto was crash detection. Again later many hours of research I decided to utilise the Ultrasonic sensors. I purchased a five pack from Amazon and waited for them to arrive. Once they came in, I wired them upward and mounted them to the front of the car.
I used the roof of the car (hot glued to the front engine housing) to mount the sensors.
I used the roof that I cut off the auto to mount to the front engine housing. I hot glued information technology so I wouldn't have to screw into it and perhaps mess upwards the engine. When mounting the senors I used hot glue, only I didn't glue directly to the sensor, I glued to the four wires that are coming off the sensor. I am not sure if information technology would have hurt it to mucilage the actual sensor, only I didn't want to take a take a chance of messing up the sensor. I did add a few LED's to the forepart board and then I could make sure that I was getting the pulses that I wanted.
A meridian view of the final wiring and LED lights.
With everything hooked up, I VNCed into the Raspberry pi where I ran my Python code. I use the sensors to catch feed dorsum then react accordingly to the distance from the object. I oasis't totally tested it yet, and on occasion the sensors do non react fast enough and my car ends upwards running into obstacles. I am hoping to take it up to a flat open parking garage sometime this calendar week and allow information technology roam around and encounter how long it tin can get earlier it crashes.
Things I still desire to do with information technology:
- Add photographic camera support so I can use it to map an surface area
- Maybe add a third sensor a little college on the front, just in case it comes to an obstruction that is off the basis.
- Make the sensors more reliable so it can clamber effectually the inside of the house (this is only to scout my cats go crazy and assault it)
Things I however am trying to effigy out:
- How to connect to my Raspberry Pi when it doesn't have WiFi support. Meaning, when I take it to a parking garage, I need someway to interface with information technology, (which I am currently doing via VNC and my laptop), when the Pi and the laptop are non on the aforementioned network. Can I practise this with Bluetooth?
- Come with better Python lawmaking that is more reliable and actually make this acquire its path.
Schematics
Code
Credits
Source: https://www.hackster.io/SQLCodeMonkey/raspberry-pi-autonomous-rc-car-a666a4
0 Response to "Dataplicity Ran Once Never Ran Again"
Post a Comment